Introduction
Fast starfighters, massive capital ships, and epic battles. These are all elements of the Star Wars saga, most notably in climactic trilogy-ending movies like Revenge of the Sith or Return of the Jedi. This past weekend many of us were treated to what fans are already saying is one of the most epic, most daring, and best-executed fleet battles in Rogue One: A Star Wars Story. In the movie’s climactic third act, we see the first formal engagement of the Alliance Navy against the evil Empire over Scarif. Sharp-eyed fans and Fleet Junkies of every persuasion noticed a lot of ships, both old and new. Yet these ships aren’t included just for visual pleasure or as Easter eggs, they are actually part of a much bigger story that has been weaved together throughout the new canon overseen by the Lucasfilm Story Group. The growth of the Rebel fleet, from its earliest days as a loosely-affiliated collection of rebel cells to the formal Alliance Navy we see in Return of the Jedi, is a story of adversity, daring, courage, and hope. From ragtag cells to a battle-ready fleet, this is the story of that evolution.
The early years (5 BBY – 2 BBY)
The growth of the Rebel fleet in many ways mirrors the growth and evolution of the Rebellion itself. Before the Declaration of Rebellion and the consolidation of the various cells into the formal Alliance, the fight against the Empire was scattered. Despite being isolated and unaffiliated, these cells all understood the need for starships to carry out attacks on Imperial targets. The size of the cell and its access to resources often dictated the types of starships. Smaller cells might possess a few converted freighters, while larger ones possessed dozens of surplus Clone Wars-era starfighters. Only a few cells fielded capital ships, mostly smaller ones like the ubiquitous Corellian Corvette so commonly found in Alderaanian service.
The union between idealistic Core World senators and brave Outer Rim fighters that eventually creates the Rebellion unfolds in this period. Senators Bail Organa of Alderaan and Mon Mothma of Chandrila, allies against the Empire since the end of the Clone Wars and the Delegation of 2000, use their power and influence to start funneling resources and support to these still-unconnected cells. One notable cell from this period was the Phoenix Squadron. Its organization and structure would be mirrored a few years later when the Alliance was formally established.
Based on the Outer Rim planet of Garel, Phoenix Squadron was better equipped than many early cells. Support from Bail Organa ensured that Commander Jun Sato had a small but well-trained force at his disposal. A single Pelta-class command frigate, a handful of CR90 corvettes, and a group of A-wings constituted the entirety of the cell’s spacefaring forces. This task force lacked even the firepower to take on a single Imperial Star Destroyer, but proved adept at attacking Imperial transports and convoys in the Outer Rim Territories. As their profile increased, Phoenix Squadron suffered heavier losses, but through perseverance, grit, and the largesse of Bail Organa (not to mention the brave actions of the crew of the Rebel ship Ghost), it expands its operations into other sectors, culminating in the capture of an Imperial carrier and the establishment of a formal hidden base on isolated Atollon.
It is in this period that Alderaan, ostensibly loyal to the Empire, emerged as one of the primary arsenals of the early rebellion. While the horrors of the Clone Wars had pushed Alderaan into pacifism, the galaxy’s slide into darkness shook the world’s leadership to action. The world has to tread a careful line, but manages to provide Phoenix Squadron and other rebel groups with Hammerhead-class corvettes, CR90 blockade runners, and starfighters.
Soon, thanks to the efforts of leaders like Organa, Mothma, Jun Sato, and Hera Syndulla, scattered cells across the galaxy begin to work together and share resources, coordinate attacks, and work together for the common good. Phoenix Squadron continued to embody this approach, capturing a squadron of badly needed Y-wing bombers, only to hand them over to the rebel cell under General Jan Dodonna. This resource sharing provided the framework for the early Rebel fleet, as well as provided critically needed ships to the groups in most desperate need. A single Hammerhead corvette or a handful of Y-wings didn’t match the nearly unlimited firepower of the Galactic Empire, but these very ships would prove critical to the Rebellion in its most desperate hour.
The formation of the fleet (2 BBY – 0 BBY)
Following Mon Mothma’s stirring Declaration of Rebellion, the various rebel cells united to form the Alliance to Restore the Republic. Under the leadership of former senators and military commanders, the Alliance High Command had two main focuses for building their fledgling forces. The first, the acquisition and expansion of starfighter squadrons, took on the main focus initially. Credit-strapped and still growing, the Alliance knew it couldn’t match the Empire capital ship for capital ship, plus the versatility of small snubfighters striking from hidden bases had proven effective. Older Y-wings and A-wings were eventually joined by game changers like the powerful and versatile X-wing starfighter, plus advanced B-wing assault ships developed by Mon Calamari engineer Quarrie. Fighter forces were quick, agile, and capable of hiding anywhere in the galaxy. However, despite this initial fighter focus, Alliance High Command began to assemble a fleet of capital ships to form the core of its small but growing navy.
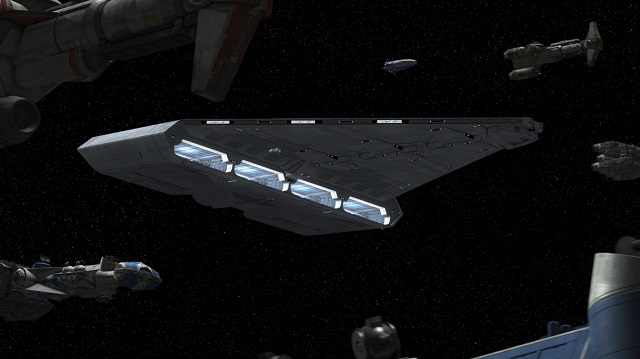
Initially, the fleet was a motley assortment of the smaller capital ships gathered from the various rebel cells – Hammerhead corvettes, CR90 blockade runners, Dornean gunships, and medium transports acquired from Gallofree Yards. These smaller ships were augmented by larger Nebulon-B frigates. Versatile and powerful ships, the Nebulon-B frigate would perform numerous roles in the Rebel fleet, acting as cruisers, starfighter carriers, and as medical frigates. Despite playing these key roles, the frigates were still outsized and outgunned by the significantly larger Star Destroyers of the Imperial Navy.
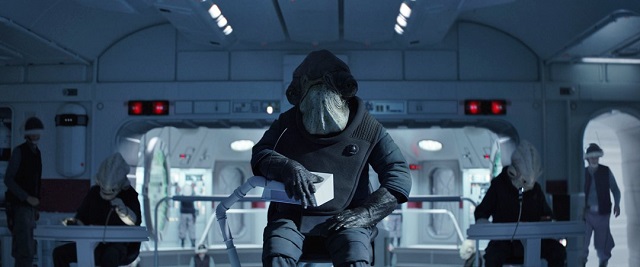
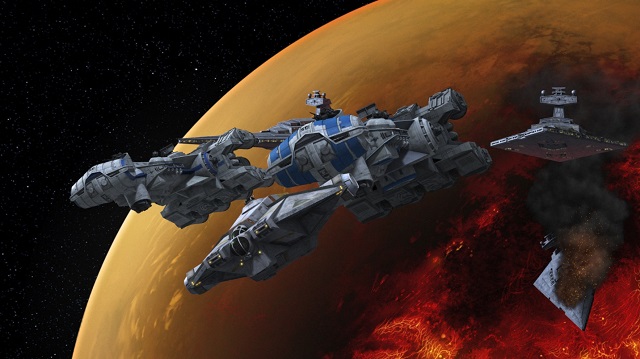
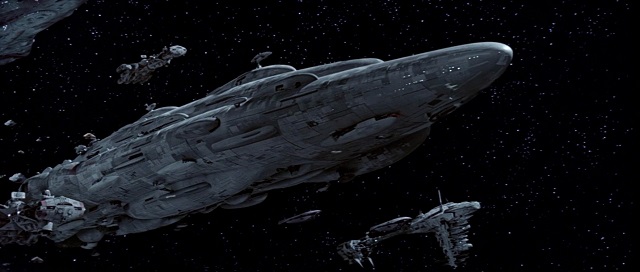
The watershed moment for the Rebellion’s naval forces occurred when the Mon Calamari joined the Alliance. A peaceful race of aquatic shipbuilders, the Mon Calamari and their neighbors the Quarren had suffered the horrors of a brief but deadly civil war during the Clone Wars. These harsh realities and brutal experiences taught them to be prepared for future conflicts and hostilities. When the Empire subjugated Mon Cala, it prompted a massive exodus from the planet. Advanced exploration ships, modern passenger liners, and hidden city ships (vessels disguised as underwater sea towers and floating cities) formed a massive evacuation armada, fleeing for deep space. The Rebellion attempted to oppose the Imperial occupation, trying several times unsuccessfully to disrupt Imperial operations there. While tragic, the occupation of Mon Cala ended up providing the Rebel Alliance with powerful new allies. The Mon Cala committed themselves wholeheartedly to the Alliance effort, donating their entire fleet and embodying the very soul of the Alliance cause. In the remote Telaris system, the ships of the Mon Cala began the process of being converted by Rebel engineers into powerful capital ships. One of the first ships off the line was the MC75 cruiser Profundity, which was placed under the command of the Mon Cala admiral Raddus and served as the first flagship of the Rebel fleet. Slowly but surely, these converted Mon Cala Star Cruisers began to form the backbone of Rebel task forces.
The X-wing space superiority fighter and Mon Cala Star Cruiser would prove to be the Rebellion’s most potent weapons, but with finite resources and lacking the deep coffers of the Galactic Empire, the growth and expansion of the Rebel fleet would take several years. Fortunately for the Alliance, Admiral Raddus and General Antoc Merrick of Starfighter Command would prove to be a smart and capable duo for leading Rebel spacefaring forces in their embryonic state. Some in the Alliance leadership preferred to keep the fleet secret and safe, allowing for the buildup of ships and materiel to go undisrupted. Others still held out hope for a diplomatic solution in the Senate, one that would make the use of the fleet unnecessary. However, the discovery of the Death Star and the realization of its impending threat forced the Rebellion into action before the dreaded weapon could be turned on the larger galaxy.
The Battles of Scarif and Yavin (0 BBY)
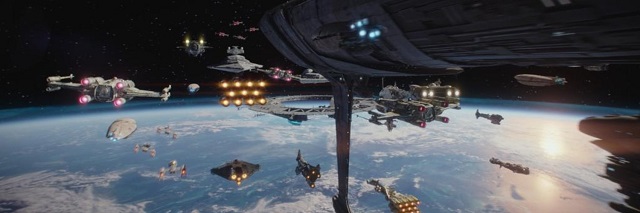
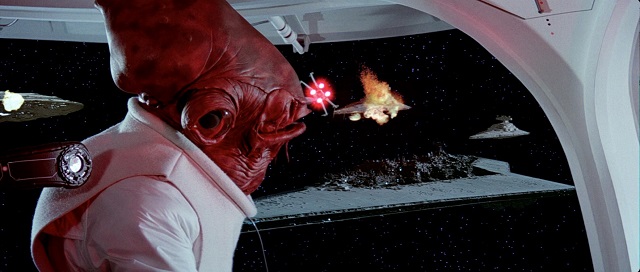
The revelation that the Death Star was a planet killer of nearly unstoppable power caused much apprehension among the Rebel leadership. The Rebel Council was split on what action to take, but the brave actions of an unsung band of Rebel heroes led by Jyn Erso forced their hand. Jyn’s team realized that the capture of the plans to the Death Star would be the only way to confirm whether the station had any weaknesses. The Rebel fleet was called into action for the first time, with Admiral Raddus and General Merrick committing the bulk of their available forces to attack Scarif and retrieve the plans that Jyn’s rogue band of soliders sacrificed everything to obtain. While Rebel soldiers on the planet’s surface valiantly fought to the death to transmit the plans, the Rebel fleet above had to destroy the shield gate to allow the transmission through. Hundreds of TIE fighters and two Imperial Star Destroyers faced off against Raddus’s Profundity, a few dozen escort ships, and the brave pilots of Blue, Green, Red, and Gold Squadrons.
The heroes of this space battle proved to be numerous, though two key elements tied directly to the early days of Rebel cooperation proved to be the deciding factors. The Y-wings of Gold Squadron, donated years earlier from Phoenix Squadron, disabled one of the Star Destroyers with ion torpedoes. Seizing the moment, Admiral Raddus ordered one of his Hammerhead corvettes to slam into the disabled Destroyer and force it into an adjacent second Star Destroyer. The brave, ultimately fatal actions of the Hammerhead corvette Lightbringer proved decisive, as the destruction of the duo of Star Destroyers culminated with the destruction of the shield gate and allowed the transmission of the plans to get through.
It was a tremendous victory for the Rebel fleet, but a costly one. Jyn’s team and General Merrick’s Blue Squadron all perished on Scarif, while Admiral Raddus and the Profundity were lost covering the escape of the remaining Rebel ships from Darth Vader’s Star Destroyer Devastator and other Imperial reinforcements. One ship in particular, the Tantive IV, barely escaped with the precious plans and one daring princess. The price paid was high, but the Rebellion now had hope. These actions all culminated in the climactic battle of Yavin, where the surviving members of Red Squadron and Gold Squadron paid the ultimate price to take the Death Star head on. The plans confirmed what Galen Erso had intended—an exposed thermal exhaust port could cause a chain reaction in the main reactor. Armed with hope, the Force, and a pair of proton torpedoes, Luke Skywalker destroyed the Death Star. The sacrifices of countless pilots, soldiers, and civilians made it possible.
Rebuilding the fleet (0 ABY – 3 ABY)
Despite the tremendous nature of the victories at Scarif and Yavin, the Rebellion could only briefly pause for celebration before returning to the work at hand. The Empire was still powerful and the Imperial Navy would soon be scouring the stars looking for the Rebels. With the loss of Raddus and Merrick, the Alliance navy had vacancies at the highest command level. Fortunately for Mon Mothma and the Rebel Council, the command of the Rebel fleet was placed in the capable & respected flippers of Admiral Ackbar. A veteran of the Clone Wars and capable commander, Ackbar assumed command of the Rebel fleet at a time of rebuilding and expansion. The first action of the fleet immediately post-Yavin was to evacuate the entire base before Imperial reprisals could take place. Ackbar personally oversaw these efforts and ensured that the base and its personnel were safely away before the Empire arrived. While Mon Mothma and General Dodonna began the search for a new base, Ackbar focused on building up his navy. Squadron rosters needed to be refilled and greater numbers of MC80 Star Cruisers slowly began to trickle out of the Telaris system, adding additional muscle and backbone to the Alliance navy. The destruction of Alderaan and the Death Star brought many new allies into the Rebellion, which further bolstered the fleet. The formal structure and organization of the fleet continued to expand and evolve as well. Under Ackbar was a cadre of tough and capable admirals, including the gruff Admiral Nantz and Admiral Massa of Duro. The Alliance was emboldened to launch a multi-sector offensive in the Mid Rim which the fleet supported, but the counterattack by Imperial forces savaged Rebel armies and forced the Rebellion to cede much of the ground it had gained.
The Imperial navy searched in vain for the Rebel fleet, necessitating that it always be on the move. The twin pillars of the Rebellion’s military strength were its main base and the fleet. The loss of one could be weathered; the loss of both could prove fatal. The main fleet wasn’t in the Hoth system when the new Alliance command post of Echo Base was found by the Empire. However, the loss at Hoth and the discovery of the second Death Star ushered in another, more desperate hour. Alliance High Command moved aboard Ackbar’s flagship Home One, while the fleet scattered into numerous smaller task forces to avoid being caught in one place. It was a dark time for the Rebellion, but the flame of hope continued to flicker.
Showdown at Endor (4 ABY)
The discovery of the second Death Star’s location by Bothan spies galvanized the Alliance to once again gather its forces for a major strike. Scattered Rebel task forces and ships were gathered at Sullust, forming a massive armada. Despite the loss of bases and the failed Mid Rim campaign, the Rebel fleet had grown considerably between Scarif and Endor. Dozens of large and powerful MC80 Star Cruisers of the Home One-type and Liberty-type formed the core of the fleet, supported by numerous escort frigates, corvettes, gunships, light cruisers, and other escorts. Starfighter Command amassed several combat wings of fighters, including X-wings, Y-wings, A-wings, and B-wings. Having witnessed the destructive firepower of the first Death Star at Jedha, Scarif, and Alderaan, the Rebellion was prepared to commit all of their forces to destroy it. Rebel Intelligence had already informed Mon Mothma of top-secret Imperial communications detailing the intended use of the new battle station. At the top of the target list were Mon Cala and Mothma’s homeworld of Chandrila. These two worlds contributed greatly to the Rebel cause and their loss would cripple the Alliance.
Endor would prove to be the climactic battle of the war. Despite falling into a trap laid by Emperor Palpatine himself, the Rebel fleet fought valiantly. Outnumbered and outgunned, the fleet that started under Raddus and expanded under Ackbar fought nose to nose with their larger Imperial counterparts. Losses were heavy, but the Imperial Starfleet suffered losses as Star Destroyers fell to Rebel attacks. Fighters under General Lando Calrissian and Commander Wedge Antilles fought with skill and determination no less than that of General Merrick’s squadrons four years earlier. When the Rebel strike team on the forest moon below destroyed the shield generator, Rebel fighters penetrated the Death Star and destroyed it with well-placed shots on its main reactor. The Rebel fleet wasn’t the only factor in the Alliance’s victory that day, but it proved to be a critical one.
Closing
The benefits of the new canon’s approach to unified and connected storytelling were fully displayed with Rogue One. Supposed “filler” episodes of Star Wars Rebels ended up proving key to future battles. Ships, characters, and battles seen or described in assorted comic books, novels, and reference guides are increasingly connected and cross referenced. We now have a definitive story that details the establishment, growth, and evolution of the Rebel fleet. There will undoubtedly be more stories that will further flesh this out in the coming years. I for one can’t wait to see what other exciting adventures are yet to be told! If patterns are followed, we can hold out hope that Episode IX will wrap up the trilogy with a massive space battle that is a worthy heir to the legacy to the battles of Coruscant, Scarif, and Endor. Until next time, Fleet Junkies HO!

This was a great ‘historical account’ – I really enjoyed it, thank you 🙂 I’d be very interested to read a bit more if you feel like updating it after we have some more details about Jakku from Aftermath: Empire’s End and maybe Episode VIII 🙂
Great article Nick. I really hope the SW ongoing does more to explain the Rebel Fleet in Endor. Not a lot of info on how it got that big in the time between films. One thing that has shocked me about the New EU has been the lack of Corellian involvement. I mean clearly they still made a lot of the ships and likely did many repairs and modding, but we have not seen their cell outright which is a bit disappointing. Maybe we will get more stuff with Wedge and that will explain more about their involvement. After all, it is not the Rebellion/New Republic without Corellia.
The sheer passion and commitment in this article is wonderful. Thank you!