and thus shot fi– aw forget it
Welcome to another installment of The Force Does Not Throw Dice. This time, we are here with some advice for novice and veteran Game Masters alike. Because let’s be honest, sometimes you just have to run an adventure and just have no time to write any adventures. Thankfully, there’s a true and tried method called “The Five Room Dungeon” that can get you out of these sticky situations.
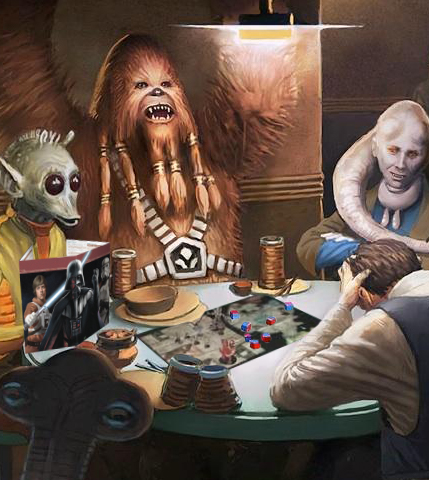
Ah, the job of a Game Master: never an easy task and most of the time a thankless one, and that’s without accounting for the hours spent writing and getting everything ready for the game. Back when we were college kids, we had all the time in the world to create our worlds, our characters, and our adventures. Things, alas, change. Being a GM and a responsible adult at the same time is not an easy task. Your friends are coming over this weekend with some pretty awesome BBQ pizza and they are going to be expecting you to be ready to guide them through several hours of fun, excitement and laughter, but you just had the worst week ever at work, plus your newborn has been crying, and you’re doing your taxes and just came back from driving your oldest to band practice… Your friends are three hours away and you are looking at an empty page. You have run out of published adventures to run. Who’s going to help the GM in desperate need for some adventure?
I have a pretty hefty section of my RPG library devoted to what I call “GM’s aides”, books from systems I don’t usually GM but that can help you when you are in dire need. A bit of everything, from the classic (if kind of weird) Central Casting books to the never-surpassed AD&D World Builder’s Guidebook, Alternity’s Tangents, d20 Modern’s Critical Locations or Star Wars d20’s Galactic Campaign Guide. All of them devoted to either getting me out of writer’s block or just helping me whip something up when I simply have no time. And still, few of these reference books have been as helpful as one single old concept I first read about in some fanzine back in the time: the Five Room Dungeon. The 5RD is a very old and very simple method for making a quick dungeon delve; if we consider that a dungeon is actually just as series of connected encounters, we can actually go even further and affirm that the 5RD is quick way to make a short and satisfying adventure.
The fine guys at Gnome Stew and Roleplaying Tips have taken good in-depth looks at what makes the 5RD model tick, but there are some idiosyncrasies to Star Wars RPG that we are going to examine. So here you have it: Eleven-ThirtyEight’s Five Room Trench Run!
Episode I: Look at the Size of that Thing
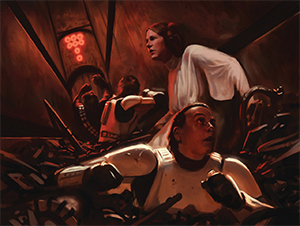
The 5RD model makes it clear: start by punching hard. And what’s more Star Wars than that? The Star Destroyer starts firing as soon as the text crawl is gone, after all. If you want to make it even more genre-appropriate, start in medias res, that is, in the middle of things. Don’t let them get comfortable. Our heroes are in the thick of the Battle of Coruscant! Stormtroopers are firing on their speeder! Their starship is dead in space and falling into the atmosphere of a gas giant! Why is this happening? Who cares? You’ll find out later! Durasteel is cracking! Blaster shots are flying! Do something!
This setup gets the blood pumping, captures your players’ interests almost instantly and, if you play your cards well, can set the tone of the whole session.
- A group of fringers is escaping in their trusty freighter from an Imperial Star Destroyer, hoping to astronavigate before their ship is vaporized.
- A Rebel strike team assaults an armored aerolimousine in the middle of a chaotic urban environment while their commander barks orders at them through their comlinks.
- A group of Jedi hopefuls is in the bowels of an ancient Sith temple, surrounded by a never ending horde of creepy crawlers that is coming through the walls.
Episode II: Aggressive Negotiations
The player characters have triumphed over the challenges you’ve thrown at them in Episode I and now perhaps they should start having an idea of what the adventure is going to be about. It’s time to wind things down a bit, let them lick their wounds and catch their breath and then face them with a challenge they can’t shoot at, be it a literal puzzle or some character interaction. This is Star Wars after all: you have your smugglers and Jedi, yes, but you also have your slicers and diplomats. Once you’ve decided what the puzzle is going to be, you can backtrack and add a few hints in Episode I so that it doesn’t come out of nowhere. This episode pleases the non-fighting types and slows things down just before the roller coaster of the last three episodes. As a rule of thumb, this episode should allow the adventuring party to access Episodes III and IV depending on how they play things: a failure sends them to Episode III, while a success takes them straight to Episode IV. Make sure there are many possible solutions to your puzzle, to avoid frustrating your people early on.
- The fringers arrive at their destination, where they are supposed to be bringing a mysterious metal statue, but the religious order that controls the only spaceport in the world won’t let them land unless they go through a complex series of rituals.
- The rebels have captured an Imperial prisoner, who might have information about a new Imperial superweapon. Interrogating them won’t be easy, especially if the prisoner activates a neurocapsule that will kill him in twenty minutes unless someone takes it out of his chest.
- The Jedi hopefuls arrive before a mysterious Sith statue, where a vision of their dead master taunts them and tries to have them despair and leave their quest for an ancient lightsaber.
Episode III: I Have a Bad Feeling About This

So your players failed Episode II, and now they have to pay for it. This is the episode when you get to play with your players’ nerves. While you slowed down the pacing in the previous episode, now it’s time to make them sweat. Let them think they’ve achieved their goal, only to find a big sloppy red herring. Things appear to have gone wrong. The enemies have apparently achieved their goal behind the screen. Everything is going as it shouldn’t. This episode is a good chance to let your players have an encounter different from the encounter they had in Episode I: if Episode I was land combat, have this one be space combat, and vice-versa. Be sure to have your players spend some resources they are going to be missing later, to make sure the final episodes are tense: medpacks, ammunition, or even abstract resources like Force or Destiny Points.
- The fringers decide to land somewhere else in the planet, but as soon as they leave their ship they are attacked by a group of Tusken Raiders. Now they have to get to the city on foot and find a way to take the massive statue with them.
- The Imperial prisoner dies, so the Rebel Alliance sends the team on the only intelligence they have to a place where they find an orbiting space station completely finished. Thankfully, it turns out to be just a repairing dock, but one where they can find more information about their target.
- Having given up, the Jedi hopefuls now have to fight for their lives against what appear to be ghostly copies of their Dark Side shelves (think of the smoke Yoda from The Clone Wars).
Episode IV: Set Your S-Foils in Attack Position
This is it: what they’ve been working for. Their target, their final objective, and the final conflict. Grab one single environmental detail that you like and build the whole episode around it, making sure the scene is engaging and interesting, and take also a good look at your party’s character sheets, making sure everyone has the opportunity to shine. Try to add a few opportunities for your tactical thinkers: you gotta make sure they feel they’ve defeated this final challenge with their own wits.
- The fringers manage to take the statue to the Japanese-style garden where they are supposed to be meeting their contact, but when they get there their contact has been captured by a team of Black Sun yakuza wielding vibrokatanas.
- The Rebel team finally gets to the Moon Liquifier. Now it’s time for a trench run, a few twists and turns through the belly of the beast, and a final duel with a dangerous TIE Advanced squadron before blowing the thing up.
- The Jedi hopefuls get to the core of the Sith temple where they find the ancient lightsaber, in the hands of a terrible Sith zombie. Cracks start appearing in floor and ceiling, and lava starts flowing in random positions around the room.

Episode V: Boba Fett? Where!?
And then, of course, you surprise them. Episode V is a final twist. It can happen during the denouement of the adventure, or as soon as they’ve finished Episode IV. If you are going to invest time in thinking any episode, make it this one: this is what will make the whole adventure memorable.
- The fringers congratulate themselves on their victory when their contact asks them if they’ve made sure no stray shot has hit his war droid, for this model is known to sometimes be activated by sudden movements. Wait, what does he mean war droid? That’s when the statue starts firing on them.
- The Moon Liquifier explodes in pieces and it seems like it’s time to head home. And then the Executor drops from hyperspace and starts vomiting hundreds of TIE Interceptors.
- You’ve probably heard this one before: the Sith revenant rises again! Be sure to screech loudly when you describe it!
And that’s it. Now you are ready to play an adventure that will last for one full session, and I’d be surprised if you needed more than thirty minutes to get ready for it. Good luck, enjoy your pizza, and see you next time!
